- Hi-Fi — проблема классификации: об истории, стандарте, маркетинге и терминологии
- Немного истории
- Hi-Fi как стандарт
- Критика и стандарт в настоящее время
- Слепые и не слепые тесты
- Prototyping 101: The Difference between Low-Fidelity and High-Fidelity Prototypes and When to Use Each
- What a prototype is, and what it isn’t
- Why we need prototypes
- What is fidelity?
- Low-fidelity prototyping
- Popular techniques
- High-fidelity prototyping
- Popular techniques
- Conclusion
Hi-Fi — проблема классификации: об истории, стандарте, маркетинге и терминологии
Этот пост назревал давно, а его содержание во многом продиктовано дискуссиями, которые нередко возникают в комментариях, спорах потребителей, а также торговых залах. В представлении большинства, понятие Hi-Fi для аудиоаппаратуры означает некий абстрактный высокий класс техники. Это представление о высоком качестве или классе редко коррелирует с конкретными спецификациями, техническими значениями и стандартами.
Немного истории
Подавляющему большинству известно, что “Hi-Fi” — есть сокращение от High Fidelity — т.е. высокая верность. Подразумевается высокая верность воспроизведения. Таким образом, мы можем условно понимать под Hi-Fi-аппаратурой некий класс устройств, верность воспроизведения у которых выше, чем у … выше, чем у абстрактного большинства других.
Само явление старше, чем термин, так как почти всегда были устройства немного качественнее и немного хуже. На заре появления аудиозаписей и аппаратуры для их воспроизведения определить, где выше верность, было сложно, но в 1924-м году случилось второе по значимости после появления фонографа Эдисона событие. Запись звука стала электрической. Можно сказать, что именно тогда появился первый Hi-Fi.
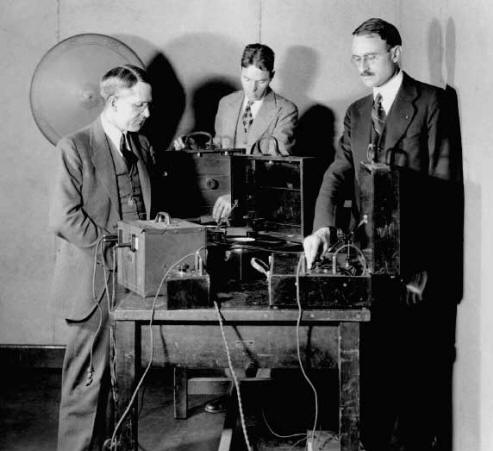
Дело в том, что записи, сделанные при помощи электрического рекордера, отличались более высоким качеством, нежели записанные при помощи механических фонографов, что уже можно считать поводом разделить устройства на классы. Таким образом, годом рождения хайфая можно считать 1924-й, когда компанией Bell Telephone Laboratories была разработана запись с применением примитивного угольного микрофона, лампового усилителя и электромеханического рекордера.
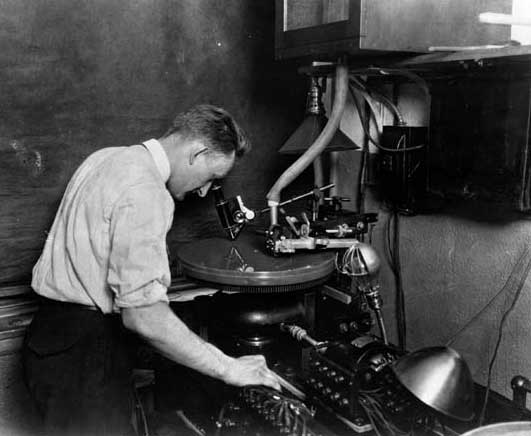
В то время основным техническим параметром, которым определялась верность воспроизведения, считался частотный диапазон. Уже к 1929-му году у электромеханических устройств он достиг значений 50 – 6000 Гц, а к середине 30-х вышел за границы 30 – 8000 Гц. Постепенно снижался уровень искажений и увеличивался динамический диапазон записей.
Новые качественные характеристики записи требовали новых возможностей от звуковоспроизводящей аппаратуры. Наиболее распространённым носителем звука в те годы были грампластинки, благодаря появлению электрофонов в начале 30-х удалось добиться их качественного воспроизведения. Появились новые головки типа ММ (moving magnet). Приблизительно в это же время начинает активно разрабатываться, а в Германии даже внедряться магнитная запись звука.
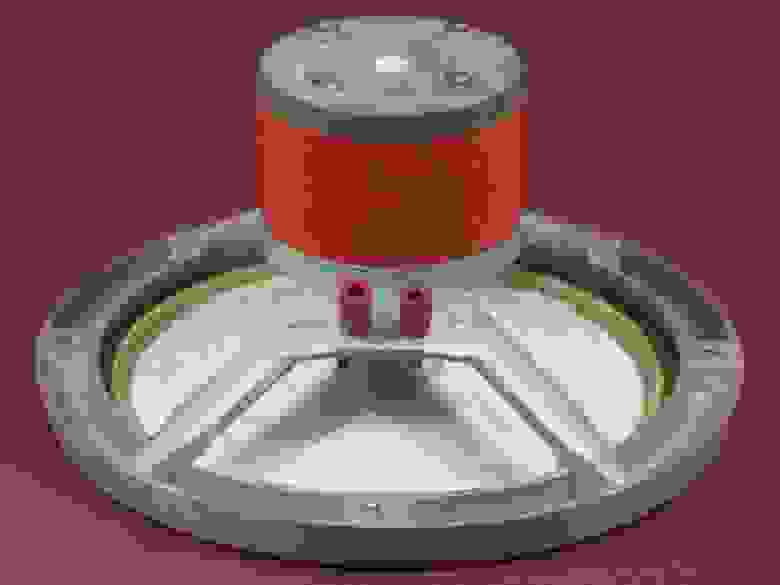
В 30-е годы существенные изменения затрагивают и излучатели звука, особенно активно ведутся разработки в области электродинамических драйверов. И вот, в 1932-м году производителем динамиков, в которых использовался постоянный магнит,
инженером Хартлеем впервые применяется термин “Hi-Fi (High Fidelity), подразумевающий высокую верность воспроизведения.
Очевидно, что автор не думал, что его маркетинговый ход станет не только повсеместно употребляемым клише, означающим качество, но и стандартом, его гарантирующим.

Время шло, качество аппаратуры росло, и к концу сороковых термин постепенно стали использовать в рекламе различных Британских и Американских компаний, а также в СМИ. Этот период совпал с очередным скачком в развитии верности звуковоспроизведения и пришелся на конец 40-х — начало 50-х:
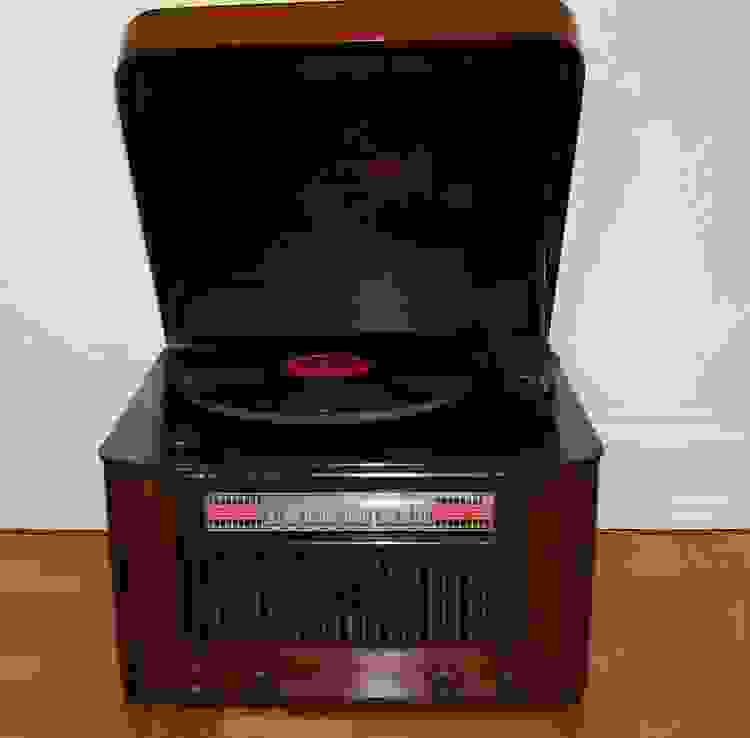
- разработаны и серийно выпущены первые виниловые пластинки Long Play (LP) 33 об/мин и электрофоны для их прослушивания;
- началось массовое производство катушечных магнитофонов с лентой;
- стартовал серийный выпуск динамических громкоговорителей;
- были усовершенствованы конструкции ламповых усилителей;
- появилось FM-радио, началось вещание в УКВ диапазоне, что гарантировало меньше помех и более широкую полосу пропускания.
В 50-х начались активнее стереозаписи, а к 60-м они стали массово выходить на виниле, который почти полностью заменил шеллак. Именно в этот период Hi-Fi из маркетингового термина начинает превращаться в стандарт. Сначала это были некие общепризнанные представления о качестве на текущий момент. К 70-м было окончательно сформировано конкретное представление о том, что именно может называться “высокой верностью”, именно так Hi-Fi стал стандартом.
Hi-Fi как стандарт
- неравномерности амплитудно-частотной характеристики (АЧХдБ);
- диапазон воспроизводимых частот;
- коэффициент нелинейных искажений или коэффициент гармоник (КНИ или Кг, %);
- отношение сигнала к уровню шумов (сигнал/шум, дБ).
В соответствии со стандартом, имеют право носить гордое наименование Hi-Fi устройства со следующими характеристиками:
Акустические системы и наушники
- Нелинейность АЧХ относительно среднего уровня звукового давления в диапазоне воспроизводимых частот 100—4000 Гц, дБ — ± 4 дБ (+4/-8 дБ);
- Коэффициент нелинейных искажений на воспроизводимых частотах 250—1000 Гц (2000 Гц), не более — 1%;
- Нелинейность АЧХ в диапазоне воспроизводимых частот 40—16000 Гц — 1,5 дБ по линейному входу (2 дБ при наличии корректора);
- Коэффициент нелинейных искажений в диапазоне воспроизводимых частот 40—12500 Гц, не более — 1%.
- Коэффициент интермодуляционных искажений в полосе воспроизводимых частот 250—8000 Гц (также вне этой полосы при снижении уровня звукового давления на 6 дБ), не более — 3%;
- Разброс параметров каналов в диапазоне воспроизводимых частот, не более — 3 дБ;
- Полоса воспроизводимых частот, 30 Гц — 15 000 Гц (выше границу получить сложно, ввиду необходимости подавления пилот-тона 19 кГц);
- Коэффициент нелинейных искажений на частоте 1 кГц, не более — 0,5%;
- Различие параметров каналов в полосе 250—6300 Гц, не более — 3 дБ;
- Переходные помехи на частотах 250—6300 Гц (6300—15000 Гц), не более — 26 дБ (15 дБ).
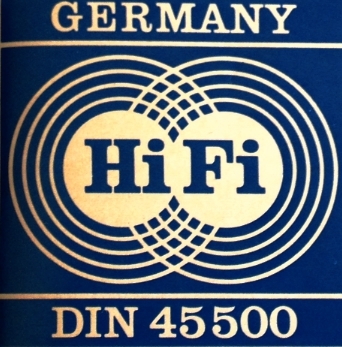
В дальнейшем DIN45500 в практически неизменном виде стал стандартом ЕС IEC 60581, а в СССР были приняты аналогичные ГОСТ 24388-88 (для УМЗЧ) и ГОСТ 23262-88 (для АС).
Критика и стандарт в настоящее время
Почти сразу же после появления, стандарт подвергся критике, так как не содержал норм по ряду существенных для звука характеристик. В стандарте нет упоминаний об интермодуляционных искажениях, динамическом диапазоне, соотношении сигнал-шум, демпифнг факторе, импульсных и переходных характеристиках, а также о множестве других измеряемых параметров. За это его критиковали инженеры. Некоторые производители, напротив, ругали за неоправданную жесткость.
К сожалению, указанные характеристики нельзя считать эталоном, особенно в наше время. Уже в момент появления очень многие устройства превосходили нормы стандарта (например, продукция японских компаний Nakamichi, YAMAHA, SONY), а сегодня ему соответствует чуть ли не каждое изделие из полукустарных мастерских КНР. Очевидно, если бы жители Поднебесной, владеющие подвальными производствами, знали нормы этого стандарта, то надпись Hi-Fi украшала бы всю их продукцию c AliExpress.
Именно по причине утраты авторитетности стандарта, некоторые производители стараются игнорировать и сам термин. Самые смелые и наглые относят свои продукты к маркетинговому классу High End, иные вообще избегают упоминания классов и просто усиленно хвалят устройство, широту и глубину сцены, бархатистость басов и артикуляцию высоких.
Между тем, в субъективных представлениях потребителей, “настоящий” Hi-Fi — по прежнему остается техникой с высокой (по современным стандартам) верностью воспроизведения. Как показывает практика, предел такой верности наступит лишь тогда, когда произведение, сыгранное в живую, будет невозможно отличить от записи.
По моему глубокому убеждению, ситуацию мог бы решить новый стандарт, соответствующий требованиям времени. Такой эталон определил бы критерии новых устройств класса Hi-Fi, например, разрядность и частоту дискретизации ЦАПов, стандарты передачи данных для беспроводных аудиоустройств, закрыл бы зияющие дыры в нормировании интермодуляционных искажений и прочих психоакустически значимых характеристик. Но пока такого стандарта нет.
Слепые и не слепые тесты
В связи с явным устареванием норм DIN45500, некоторые из производителей и пользователей считают важной объективную экспертизу и живые тесты. Всех их можно разделить на две условные категории, те, кто предпочитает видеть то, что слушает и те, кто доверяет двойному слепому.
В нулевых разразился глобального масштаба стаканный холивар, относительно двойного слепого тестирования. Роберт Харли и Джон Аткинсон из аудиофильского издания «Absolute Sound» доказывали, что слепые тесты “не дают реальной картины” и что «… существенно искажают процесс прослушивания и бесполезны при определении верности воспроизведения».
Редактор авторитетного немецкого издания Soundstage, Дуг Шнайдер, своими статьями от 2009-го года полностью опроверг выводы авторов «Absolute Sound», заявив, в частности, что: «Слепые тесты — это основа десятилетних исследований в области проектирования громкоговорителей». Сегодня двойными слепыми тестами пользуются многие известные производители, в их числе Axiom, Energy, Mirage, Paradigm, PSB и Revel. Проблема лишь в том, что использование исключительно слепых тестов — это шаг назад к определению высокой верности “на глазок”, как в 50-е — 60-е годы.
К сожалению, появление нового HI-FI стандарта сегодня — маловероятная история. В нем не заинтересовано огромное количество производителей, которые понимают — введение норм отразится на стоимости производства, которую любому производителю хочется снизить. Потребителям остается надеяться на собственные уши и точность информации в спецификациях, а также великую “магическую” силу двойного слепого метода. Буду признателен за ваши мнения в комментариях, опишите ваши пользовательские впечатления от компонентов класса Hi-Fi, напишите, есть ли, по вашему мнению, необходимость в новом Hi-Fi стандарте.
Традиционная реклама
Мы продаём электронику, в частности в нашем каталоге широко представлено Hi-Fi аудио.
Источник
Prototyping 101: The Difference between Low-Fidelity and High-Fidelity Prototypes and When to Use Each

Adobe Stock / ijeab
In today’s industry of rapidly-growing products, user experience (UX) design has become increasingly important. It’s clear that design-led companies outperform their competitors. Prototyping plays a vital role in the process of creating successful UX, but for many product teams, prototyping is still one of the most confusing parts of the UX design process. No wonder it’s unclear — a prototype can be almost anything, from a series of paper sketches representing the different screens or states of an app to a fully-functional, pixel-perfect app.
In this article, I’ll provide answers to the following questions related to prototyping:
- What is a prototype and when do you need it?
- What is “prototype fidelity” and what is the difference between a low-fidelity prototype and a high-fidelity prototype?
- What techniques can be used to build prototypes?
What a prototype is, and what it isn’t
We often hear the term “prototype” in a lot of different contexts. Because of this, there might confusion regarding its meaning.
In its basic form, a prototype is an expression of design intent. Prototyping allows designers to present their designs and see them in action. In the context of digital products, a prototype is a simulation of the final interaction between the user and the interface. Depending on what a product team needs a prototype to do, it can simulate an entire app or just a single interaction.
A prototype is a simulation of how a finished product will work. It allows product teams to test the usability and feasibility of their designs.
A lot of people confuse prototypes with sketches, wireframes, and mockups. These assets are not prototypes. The idea of simulation (read, “interactivity”) is essential for prototypes. That’s why static assets — such as sketches, wireframes, and mockups — can’t be considered prototypes.
Why we need prototypes
The primary goal of building a prototype is to test designs (and product ideas) before creating real products. Your product’s success is directly related to whether you test it or not. Without any doubt, your design will be tested when the product becomes available on the market and people begin using it. If this is the first-ever testing, there’s a high likelihood of negative feedback from users. Therefore, it’s always better to collect feedback during the low-risk research phase, and before public release.
The following are two cases that require a prototype:
- Ensure the design concept works as intended. In most cases, it’s relatively easy to test a concept with real users. Once an interactive version of a product idea is in the hands of real users, a product team will be able to see how a target audience wants to use the product. Based on this feedback, it’s possible to adjust an initial concept.
- Determine if people are able use a product. Prototyping is essential for finding and resolving usability issues before launch. Testing reveals areas that need improvement. That’s why so many product teams create prototypes, have users test them, and iterate the design until it’s good enough.
What is fidelity?
Prototypes don’t necessarily look like final products — they can have different fidelity. The fidelity of a prototype refers to how it conveys the look-and-feel of the final product (basically, its level of detail and realism).
Fidelity can vary in the areas of:
There are many types of prototypes, ranging anywhere between these two extremes:
Product teams choose a prototype’s fidelity based on the goals of prototyping, completeness of design, and available resources.
Low-fidelity prototyping
Low-fidelity (lo-fi) prototyping is a quick and easy way to translate high-level design concepts into tangible and testable artifacts. The first and most important role of lo-fi prototypes is to check and test functionality rather than the visual appearance of the product.
Here are the basic characteristics of low-fidelity prototyping:
- Visual design: Only some of the visual attributes of the final product are presented (such as shapes of elements, basic visual hierarchy, etc.).
- Content: Only key elements of the content are included.
- Interactivity: The prototype can be simulated by a real human_._ During a testing session, a particular person who is familiar with design acts as a computer and manually changes the design’s state in real-time. Interactivity can also be created from wireframes, also known as “connected wireframes.” This type of prototype is basically wireframes linked to each other inside an application like PowerPoint or Keynote, or by using a special digital prototyping tool such as Adobe XD.
Pros
- Inexpensive. The clear advantage of low-fidelity prototyping is its extremely low cost.
- Fast. It’s possible to create a lo-fi paper prototype in just five to ten minutes. This allows product teams to explore different ideas without too much effort.
- Collaborative. This type of prototyping stimulates group work. Since lo-fi prototyping doesn’t require special skills, more people can be involved in the design process. Even non-designers can play an active part in the idea-formulation process.
- Clarifying. Both team members and stakeholders will have a much clearer expectation about an upcoming project.hgygh
Cons
- Uncertainty during testing. With a lo-fi prototype, it might be unclear to test participants what is supposed to work and what isn’t. A low-fidelity prototype requires a lot of imagination from the user, limiting the outcome of user testing.
- Limited interactivity. It’s impossible to convey complex animations or transitions using this type of prototype.
Popular techniques
Paper prototyping and clickable wireframes are two popular low-fidelity prototyping techniques. Both techniques are focused on providing the fastest-possible way to iterate design ideas until both the project team and the stakeholders are happy with the basics.
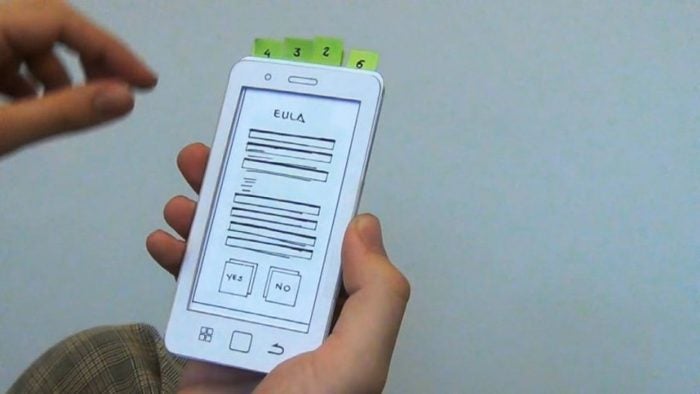
Paper prototyping
Paper prototyping allows you to prototype a digital product interface without using digital software. The technique is based on creating hand drawings of different screens that represent user interfaces of a product. While this is a relatively simple technique, it can be useful when a product team needs to explore different ideas and refine designs quickly. This is especially true in the early stages of design when the team is trying different approaches.

Simple screens are drawn on paper. A common practice for testing these prototypes is to have one person play ‘computer,’ switching the sketches around according to user choices. Image source: UX Playground
The benefits of using this technique include:
- Leverage common design skills. Everyone can sketch (even those who say they can’t) and this means that everyone can build paper prototypes.
- Allow early testing. Testing prototypes early lets product teams find big-picture problems — such as unclear information architecture — before they become too difficult to handle.
- Support rapid experimentation. Different user interface elements can be drawn, cut out, copied to make extras, and then assembled on a new piece of paper. With paper prototypes, it’s also possible to mimic complex interactions, such as scrolling.
User interfaces can be quickly prototyped and tested. Image source: Vimeo
- Serve as documentation. Unlike digital prototypes, paper prototypes can be used as a reference for future iterations. Notes and revisions can be written either directly on the prototype or on sticky notes attached to the pages.
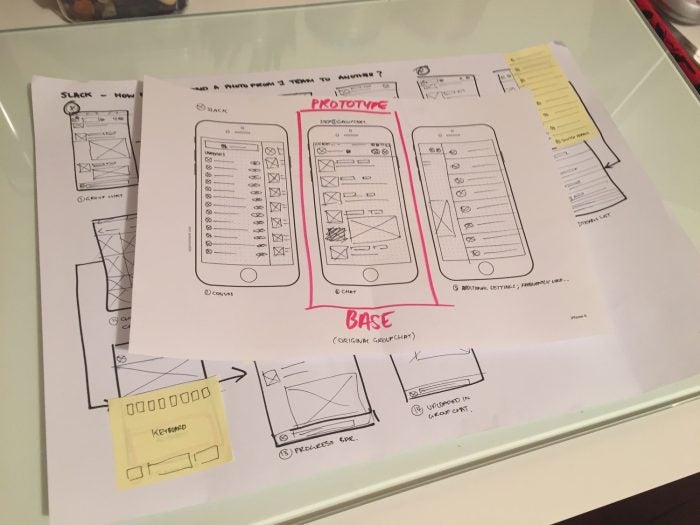
Paper prototypes can assist in documentation. Notes and revisions will support designers and developers when they will create an actual product. Image source: inesnorman
- Facilitate adjustments. Using paper prototypes, it’s possible to make changes during the testing session. If designers need to add a change to the prototype they can quickly sketch a response or erase part of the design.
If you want to use paper prototyping for usability testing it’s important to consider the natural limitations of this technique:
- An additional person is required to conduct the test session. You’ll need at least two people to conduct the test. One person will be the facilitator (‘computer’) that’s helping the test participant walk through the design and the other person will be actually testing the app.
- It’s hard to convey complicated operations. Paper prototypes are less suitable for visually-complex or highly-interactive interfaces.
Considering the advantages and disadvantages, it’s recommended to use paper prototyping during the early stages of design only, when a project is still abstract or in the process of forming. The further the team gets into the design process, the more significant the gap between paper prototypes and the final product will be.
Clickable wireframes
A wireframe is a visual representation of a product page that the designer can use to arrange page elements. Wireframes can be used as a foundation for lo-fi prototypes. Clickable wireframes are the simplest form of interactive prototype — created by linking static wireframes together.
Just like paper prototypes, clickable wireframes often don’t look like the finished product, but they do have one significant advantage over paper prototypes — they don’t require a separate person to work as a facilitator during the testing session.
The benefits of using this technique include:
- Existing design deliverables can be reused. During a particular phase of the design process you’ll have wireframes or sketches that represent your product’s UI design. In most cases, it’s possible to use them to create a clickable flow.
- Layouts can be easily changed. Designers can easily adapt wireframes based on user feedback and repeat the testing process. With the right tool, it’s easy to create or modify click-through prototypes without spending a lot of extra time.
Low-fidelity prototypes can be created using tools for presentation (such as PowerPoint or Keynote):

By linking together different pages, you can create a very basic prototype in software like PowerPoint and Keynote.
They can also be created using tools made specifically for prototyping. Using such tools has one crucial advantage: you can move from a low-fidelity to a high-fidelity prototype without switching the prototyping tool.
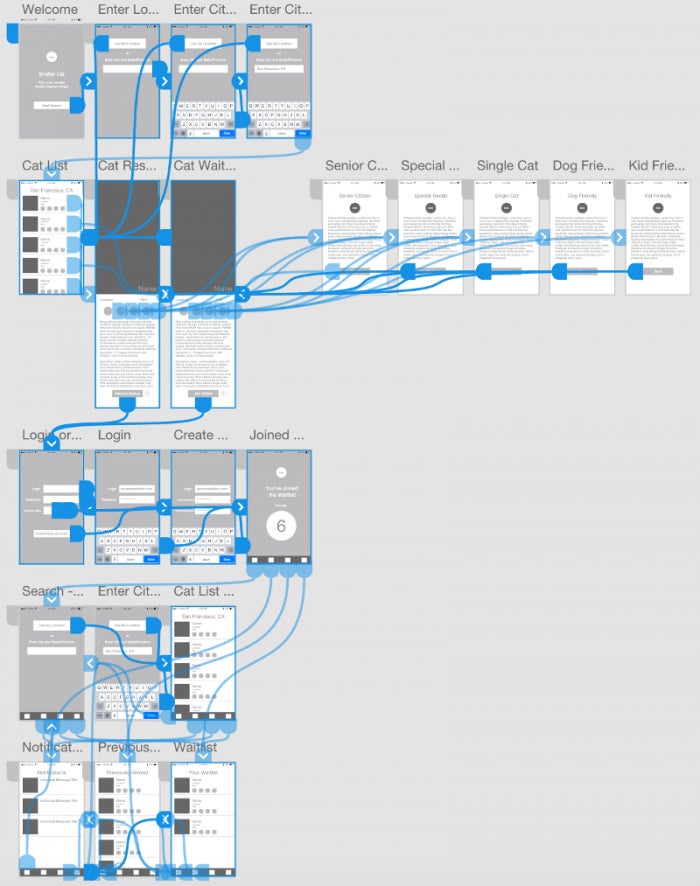
An example of a low-fidelity prototype made in Adobe XD.
High-fidelity prototyping
High-fidelity (hi-fi) prototypes appear and function as similar as possible to the actual product that will ship. Teams usually create high-fidelity prototypes when they have a solid understanding of what they are going to build and they need to either test it with real users or get final-design approval from stakeholders.
The basic characteristics of high-fidelity prototyping include:
- Visual design_:_ Realistic and detailed design — all interface elements, spacing, and graphics look just like a real app or website.
- Content: Designers use real or similar-to-real content. The prototype includes most or all of the content that will appear in the final design.
- Interactivity: Prototypes are highly realistic in their interactions.
Pros
- Meaningful feedback during usability testing. High-fidelity prototypes often look like real products to users. This means that during usability testing sessions, test participants will be more likely to behave naturally — as if they were interacting with the real product.
- Testability of specific UI elements or interactions. With hi-fi interactivity, it’s possible to test graphical elements like affordance or specific interactions, such as animated transitions and microinteractions.
- Easy buy-in from clients and stakeholders. This type of prototype is also good for demonstrations to stakeholders. It gives clients and potential investors a clear idea of how a product is supposed to work. An excellent high-fidelity prototype gets people excited about your design in ways a lo-fi, bare-bones prototype can’t.
Cons
- Higher costs. In comparison with low-fidelity prototypes, creating high-fidelity prototypes implies higher costs, both temporal and financial.
Popular techniques
A digital prototype created using a special tool
Digital prototypes are the most common form of hi-fi prototyping. Nowadays, the variety of specialized software allows designers to create visually rich, powerful prototypes full of interactive effects and complex animations.

A high-fidelity interactive prototype created in Adobe XD and mirrored on an iPhone.
The benefits of using this technique include:
- Optimization for devices. Specialized software allows designers to preview a prototype in a web browser or on any desktop or mobile device. This helps UX and UI designers achieve optimal layouts on different types of devices.
- Less clarification during usability testing. High-fidelity interactivity frees the designer from having to clarify concepts during testing, allowing the designer to focus on observation instead.
Coded prototypes
A hi-fi, coded prototype is a solution that is pretty close to the ready-to-release version of a product. An example of such prototype would be a rich interactive sandbox that allows test participants to explore a product’s different features. This type of prototyping is recommended for designers who are confident in their coding skills.
The benefits of using this technique include:
- Familiarity with the platform’s constraints. Coding allows designers to understand the true capabilities and constraints of the platform they’re designing for.
- Efficiency. A coded prototype can be a good foundation for a fully-functioning app. Assuming you’re not building a one-time throwaway prototype, what you build will provide the groundwork for the final product. If it’s possible to use prototype code in the final product, you’ll save a huge amount of time and energy down the road. At the same time, it’s important to understand that prototyping is largely about speed — the goal is not to create reusable code, it’s to implement a design in a way that people can interact with as quickly as possible.
Conclusion
If delivering a good user experience is the goal of your project —and it should be — then prototyping must be a part of your UX design process. It’s crucial to choose the most effective method of prototyping — minimizing work and maximizing learning — based on your product’s need. The end result will be overall improved design that is based on prototype testing.
Источник